
The future belongs to those who believe in the beauty of their dreams.
~ Eleanor Roosevelt.
Planning to create an e-book but don’t know what tools you’ll be using? I remember exactly how that felt when I first started. The idea of writing a book was exciting, but the moment I thought about turning my manuscript into something that looked professional, I froze. All I had was a plain text file and a dream, and neither one of them knew how to make a PDF.
In this day and age, no one will stop you from building your own e-book, not even a publishing house. With the increasing toolset that makes publishing easy, you can now do it all with open-source tools, and the best part is that they are free. In this article we will be discussing how to make a beautifully designed PDF using CSS3 and ASCII Doctor. So how do we do that?
🛠️ Creating the Workflow
After searching through all the internet, we found multiple clues on how big publishing houses produce ebooks using AsciiDoctor and HTML5. But there is a catch: most of them use proprietary tools like PrinceXML and Antenna House to create beautiful and professionally designed PDF outputs. Those tools produce stunning results, but they also come with serious license fees that make no sense for a hobby project. But don’t lose hope, as we got you covered in this how to. The whole pipeline we are going to build is open source from start to finish.
First, you may need to set up your workstation to produce beautiful rich PDF. You need of course asciidoctor.
gem install asciidoctorasciidoctor is the workhorse of this entire workflow. It takes your plain text asciidoc document and converts it into HTML5, keeping all your headings, tables, and syntax-highlighted code blocks intact along the way. If you can write a text file, you can write AsciiDoc.
After asciidoctor you need to install weasyprint.
pip install weasyprintIf you’re curious why I would pick weasyprint, it’s because there is no useful toolset in Ruby for this job. Most of the HTML5 to PDF Ruby gems rely on the wkhtmltopdf binary, which is an extra system dependency and one more thing that can break on a fresh machine. And prawn is not the answer either, since it relies purely on hard-coded design that you are probably not familiar with compared to CSS3. WeasyPrint, on the other hand, is a pure Python renderer that understands CSS3 paged media, which means you can design your PDF the way design is meant to be done: with stylesheets.
Now it’s time to get your hands dirty, create a simple ASCII Doctor document:
:doctype: book
:author: Some Author
:doctitle: Some Title
:description: Some Description
:keywords: some keywords
:toc:
:toclevels: 2
:sectnumlevels: 2
:icons: font
:icon-set: fa
:stem:
:hide-uri-scheme:
:source-highlighter: pygments
:pygments-style: xcode
:imagesdir: assets/images
:chapter-label: Chapter
:appendix-caption: Appendix
:creator: {author}
:uuid: e9a22dcf-2d0a-4237-addd-527fb847d816
:front-cover-image: image:cover.png[cover,1050,1600]
:title-logo-image: image:logo.svg[pdfwidth=4.25in,align=center]
:copyright: (c) {docyear} Some Press
:lang: en
:sourcedir: {docdir}/samples/code
:datadir: {docdir}/samples/data
:nofooter:
ifdef::backend-html5[]
:data-uri:
:stylesdir: {docdir}/assets/styles/html/themes
:stylesheet: asciidoctor.css
:linkcss:
:mathematical-format: svg
:mathematical-ppi: 300
endif::[]

= {doctitle}

// And more...
What you are looking at is a full document header for a book-style project. It sets up the title, the author, a table of contents, syntax highlighting, and even a front cover image, all in a few lines of plain text. Take note of the two lines near the end of the block: stylesdir and stylesheet. Those tell AsciiDoctor where to find your custom CSS3 stylesheet, and they are the key to the whole design process. This stylesdir will be the path where you will be storing your custom CSS3 stylesheets, so you will need to create that folder and modify those lines to point at your own theme.
Assuming you’re working in the root directory of your ASCII Doc project, create a themes folder that will hold your CSS files. After that, clone the asciidoctor-stylesheet-factory repository, which is where you’ll be spending time customizing the design of your PDF. It is a collection of SASS themes that the AsciiDoctor community has been refining for years, so you are not starting from a blank canvas.
mkdir -p $PWD/assets/vendor
git clone https://github.com/asciidoctor/asciidoctor-stylesheet-factory $PWD/assets/vendor/asciidoctor-stylesheet-factory
Then change the stylesdir in your asciidoc document to point to /assets/vendor/asciidoctor-stylesheet-factory/stylesheets. It’s not yet finished as we need to generate the required CSS files from the SASS sources.
cd $PWD/assets/vendor/asciidoctor-stylesheet-factory
bundle install
npm install cssshrinkwrap
./build-stylesheets.sh
The commands above, if deconstructed, would be:
- Change directory to the cloned repository path.
- Install all the gems required by the repository.
- Install the node dependency used to minify the CSS needed by the
build-styleheetscript.
Alternatively, you could run compass compile which skips the entire process of minification inside the build-stylesheet script. As a side note, always study all the commands before executing them on your own workstation. Getting into the habit of reading scripts before running them will save you from a lot of headaches, and it is a good practice to keep even for commands you trust.
Now this is where the fun begins: modify the theme (SASS file) you want to use inside the repository that we cloned. This is your chance to make the design your own. Change the colors, the fonts, the spacing, anything your CSS3 knowledge allows. Compile the file and generate your PDF.
asciidoctor --backend=html5 -a max-width=55em --out-file=sample.html my-sample.adoc
weasyprint sample.html sample.pdf
What this will do is create an HTML5 compatible document from your asciidoc source, complete with your custom theme already baked in. Then, using the sample.html that was just generated, the second command hands it to WeasyPrint to produce the final sample.pdf. Two commands, and your document goes from plain text to a professionally styled PDF.
Voila! A generated PDF with CSS design.

So, here’s a recap of what you’ve learned so far.
- Get to know the tools needed to create a beautifully designed PDF.
- Modify stylesheets intended to create PDFs.
- Generate HTML5 from
asciidocsource. - Create PDF from HTML5.
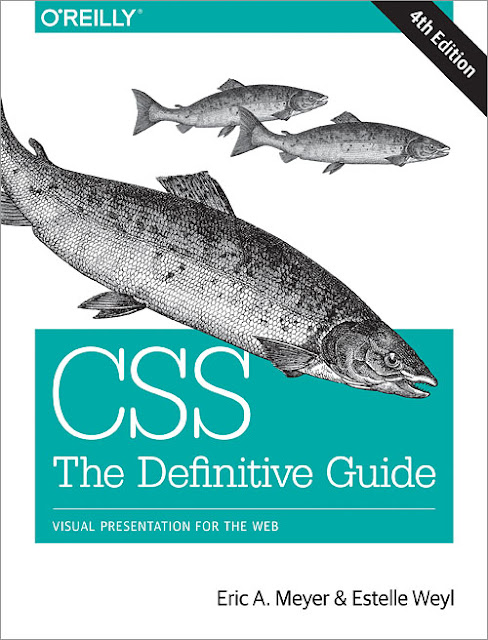
If you want to take your CSS3 skills even further, I’d recommend this book. It covers the language in depth, and it pairs perfectly with everything we just built.
🚀 Where to go now?
Now, you know how to style and generate PDF with CSS + HTML5. But a PDF is just the beginning of the publishing journey. The same set of tools can take you to e-book formats, styled HTML for the web, and even print-ready documents, all from the same asciidoc source. On the next chapter we will go in depth on how to make an e-book from start to finish. Stay tuned.